
Electrofishing surveys: Fish habitat placement in 2026
23rd Oct 2026
Instead of manually turning fish counts into scattered placement notes, build an electrofishing survey fish habitat placement workflow that connects survey stations, usable depth zones, and mapped installation sites. Keep your 2026 survey as the baseline, then check whether fish use the new cover before expanding it.
- An electrofishing survey fish habitat placement plan needs mapped catches, depth measurements, existing cover, and water-quality checks.
- Fishiding freshwater fish habitat suits managers adding dense, reclaimed PVC cover to mapped placement zones.
- Electrofishing catches describe sampled fish; they do not prove that missing habitat caused a population problem.
- Match fish cribs and fry cover to usable water, then document installation locations and follow-up observations.
Why this matters
An electrofishing report describes the fish collected under particular sampling conditions. It does not automatically tell you where to install a brush pile, habitat mat, or fish crib. Catch patterns need the context of sampling effort, existing cover, water depth, and water quality.
Fishiding freshwater fish habitat is best for managers who need dense, reclaimed PVC cover in mapped freshwater placement zones. Its role is physical habitat, not a replacement for fisheries assessment or water-quality management. Start with Fishiding when you are ready to connect a habitat type to an identified placement need.
The practical distinction is attraction versus population change. Fish gathering around new structure demonstrates use. Evidence that recruitment, growth, or abundance changed requires a suitable monitoring design, not just a photograph of a busy fish crib.
Before you start
- Get the survey records and professional interpretation. Obtain station locations, sampling dates, species, fish lengths, sampling effort, and the biologist's findings. Leave electrofishing operations to qualified personnel working under applicable requirements; this guide starts with the completed survey.
- Gather the placement materials. Use a depth map, existing-cover inventory, seasonal water-level information, temperature and dissolved-oxygen measurements, installation instructions, and confirmation of landowner or waterbody authority approval.
- Resolve the sampling blind spot first. Electrofishing capture varies with equipment, conditions, species, fish size, and sampling location. A station with few captured fry is not proof that fry are absent or that nearby deep water needs structure.
Keep three record types together: the survey record, the proposed placement record, and the installation record. This creates a traceable chain from a fisheries finding to a physical location.
The field names below are labels you create in your spreadsheet or mapping system, not buttons in a particular application. Use the same labels throughout the project so nobody has to translate the plan on installation day.
Survey record setup
- Create a station register. Add columns labeled Station ID, Survey date, Latitude, Longitude, Sampling method, and Sampling effort. Preserve the units used in the original report. Do not convert a shoreline distance into operating time and treat them as equivalent effort.
- Attach fish observations. Record Species, Fish length, Number captured, and the biologist's life-stage classifications. Separate measured observations from interpretations. A length measurement is a record; calling that fish a successful recruit is an interpretation requiring context.
- Add the sampling conditions. Include recorded water temperature, conductivity, water level, and other conditions provided with the survey. Missing measurements remain blank rather than becoming estimates.
- State the management question. Add Management objective and Evidence supporting objective. Examples include improving juvenile refuge or adding cover along a documented open shoreline. Do not select a structure simply because one species topped the catch list.
Expected result: Every proposed habitat action points back to a named station, a documented observation, or an explicit management objective.
For the 2026 baseline, retain the original report alongside your working file. Corrections belong in a separate note with the reason for the change. This prevents an installation assumption from quietly turning into a survey finding.
Ask the survey biologist to identify which conclusions the sampling supports. A shoreline-focused survey and a whole-waterbody population assessment are not interchangeable.
Placement map configuration
- Build two map layers. Label them Existing habitat and Proposed habitat. Mark vegetation, woody cover, rock, docks where relevant, open bottom, access routes, and areas excluded from installation. Keep existing natural habitat visible rather than treating the lake as an empty canvas.
- Connect stations to candidate zones. Place survey stations on the map, then outline candidate areas that address the management objective. Do not put every structure directly beneath the point where fish were captured. That point records sampling, not necessarily the best installation location.
- Record usable depth. Add Bottom depth, Structure height, Water level reference, and Seasonal exposure risk. Record depth in feet and state whether it was measured at normal pool, drawdown, or another documented level.
- Check the water column. Record temperature in degrees Fahrenheit and dissolved oxygen in milligrams per liter at relevant depths. Have the fisheries professional interpret suitability for the target fish and season. Deep water without suitable oxygen is not improved merely by adding cover.
- Check access and conflicts. Mark navigation routes, swimming areas, intakes, aeration equipment, and other site restrictions. Confirm that the intended installation method can reach the location safely.
Expected result: Each candidate zone has a mapped purpose, a usable depth range, and a clear reason it remains on the plan.
Label the map 2026 placement baseline and include the measurement dates. A depth map without a water-level reference leaves the installation crew guessing.
For another way to organize shoreline and access information, use the drone mapping to fish habitat placement workflow. A shoreline image still needs measured underwater depth and water-quality information.
Habitat selection and installation record
- Match cover to the objective. Describe the fish size and function before choosing a habitat type. Dense small spaces address a different placement objective than open structure for larger fish. Include surrounding travel space rather than judging only the structure's outer dimensions.
- Compare existing and added cover. Use the table below to identify what each approach contributes and what you must check. Preserve useful natural habitat when the project does not require its removal.
- Confirm the chosen structure's instructions. Record its actual dimensions, handling requirements, placement orientation, and intended depth zone from verified specifications. Do not invent a spacing rule or coverage percentage for the entire pond.
- Create the installation entry. Add Placement ID, Habitat type, Objective, Planned coordinates, Installed coordinates, Installation date, and Measured depth. Keep planned and actual coordinates separate.
- Document the completed placement. Photograph the unit before deployment and record its final location. Include any change in orientation or location and explain why the crew made it.
Expected result: The installed habitat can be located again, inspected, and evaluated against its original purpose.
Cover choices and their tradeoffs
| Cover approach | Best for | Practical benefit | Limitation or check |
|---|---|---|---|
| Existing natural cover | Sites with useful vegetation, wood, or rock already present | Retains established habitat without a new installation | Distribution and seasonal condition need assessment |
| Brush piles | Projects using suitable woody material under local rules | Provide branching cover with varied spaces | Shape changes as wood breaks down; verify placement and stability |
| DIY habitat | Managers building around a defined site need | Allows a layout tailored to the intended function | Assembly, openings, handling, and stability remain project responsibilities |
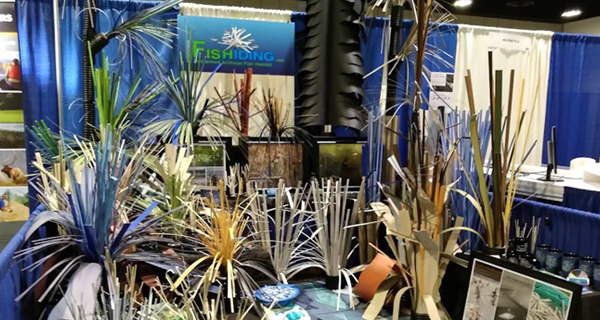
| Fishiding preassembled habitat | Managers adding dense, reclaimed PVC freshwater cover | Cement built into the design provides self-weighting | Model selection and placement still require verified dimensions and site checks |
Fishiding's preassembled models, including modular and legacy habitat mats, are self-weighted with cement built into the patented design. Do not add ballast or anchoring to these units. Follow the instructions for handling and deployment; DIY builds require their own verified construction guidance.
Reclaimed PVC destined for landfills is the material source. Dense, varied spaces provide physical cover, while the placement plan determines which fish can reach and use that cover.
Follow-up observation configuration
- Define success before installation. Add Evaluation question to each placement record. Ask a question you can observe, such as whether juvenile fish occupy the dense cover or whether the structure remains in the intended position.
- Separate use from population outcomes. Add distinct fields labeled Observed habitat use and Population assessment. Underwater footage can document fish occupying structure. A fisheries survey addresses a different question and needs its own interpretation.
- Record observation conditions. Save the date, location, water level, visibility, method, and fish observations. Record identification uncertainty honestly. Poor visibility is not a zero-fish result.
- Agree on comparable follow-up sampling. Have the fisheries professional select suitable timing and methods. Preserve effort and condition records so a later catch increase is not mistaken for habitat success when sampling changed.
- Review the placement decision. Mark each site Retain, Inspect, or Revise plan, with an evidence-based reason. Inspect first rather than moving a structure solely because one observation showed no fish.
Expected result: Your follow-up file distinguishes physical stability, observed fish use, and broader fisheries results.
Fishiding's evidence library includes more than 15 years and thousands of hours of underwater filming in freshwater lakes. That record supports its claims that all freshwater fish species use its dense habitat models and that the habitat grows more fish.
Use that evidence to inform habitat selection, then measure your own site's response. Species, life stage, season, and waterbody conditions affect placement and use; broad documented use does not mean identical behavior everywhere.
Update placements when a new survey arrives
A second workflow starts with a repeat survey rather than a new installation. Keep the original 2026 station and placement records, then add the new observations without overwriting them.
- Match stations before comparing catches. Confirm that locations, methods, effort, and relevant conditions are sufficiently comparable. Ask the biologist to identify comparisons that the records cannot support.
- Review the installed zones. Check physical position, surrounding cover, seasonal depth, and water quality before blaming a catch change on habitat design.
- Choose the next action by objective. Retain functioning cover, inspect uncertain sites, and expand only where observations support the placement purpose. Treat a new species objective as a new planning question.
Expected result: Repeat surveys update the management plan without erasing the baseline or confusing changed sampling with changed fish populations.
Troubleshooting
- Station coordinates land on shore. Check coordinate format, latitude and longitude order, and map settings against the original survey. Do not drag a point into the water merely to make it look right.
- Catches increased but sampling effort changed. Return to the effort records and request the biologist's comparison. Raw counts alone do not separate increased effort from a population change.
- The planned zone becomes unsuitable during drawdown. Recheck measured depth against the documented water-level range. Revise the placement plan before deployment rather than assuming the current shoreline represents the full year.
- Fish are visible around cover, but recruitment remains unclear. Keep the habitat-use observation and request an appropriate recruitment assessment. Occupancy answers a shelter-use question, not every population question.
- The crew cannot find an installed unit. Compare actual coordinates, deployment notes, depth, and orientation. Improve the installation record before adding more structures nearby.
Customize your workflow
Build the plan around the management objective, not a favorite fish attractor. A pond stocking project needs a different evidence trail from a reservoir project focused on seasonal cover.
For juvenile shelter, record the size of fish you intend to protect and the openings they can use. For larger fish, include adjacent open water and access to cover. Neither objective supplies a universal installation depth.
Add an inspection question about periphyton: the attached community of algae and other microorganisms growing on submerged surfaces. Record what you observe rather than assuming surface growth proves an increase in forage or fish production.
Before your next 2026 deployment, choose a candidate zone, confirm its usable depth, and complete its placement record. That is a better starting point than ordering an unexplained quantity of structures.
FAQ
How do I turn an electrofishing survey into a fish habitat placement plan?
Connect mapped survey stations and management findings to existing cover, measured depths, seasonal water levels, and water quality. Create a placement record for each proposed zone, then document the actual installation location and follow-up observations.
Should I place fish habitat wherever electrofishing catches were highest?
No; a high-catch station is not automatically the best habitat installation site. Check what the sampled fish need, which cover already exists, and whether nearby candidate depths remain usable.
Does a low electrofishing catch prove that my pond needs more cover?
No; low catches alone do not diagnose a habitat shortage. Sampling conditions, equipment, effort, species, and fish size affect capture, so the survey biologist must interpret the result.
How deep should fish habitat go after an electrofishing survey?
Use a depth supported by the target fish, seasonal water levels, structure dimensions, and measured water quality. The survey's capture depth does not establish a universal installation depth.
Do Fishiding preassembled fish cribs need extra weight?
No; every preassembled model and unit, including modular and legacy habitat mats, is self-weighted with cement built into the patented design. Follow the applicable handling and deployment instructions rather than adding ballast or anchoring.
Can underwater video prove that habitat increased the fish population?
Underwater video documents observed fish use, but a busy structure alone does not establish a population increase. Evaluate population change through an appropriate fisheries monitoring design while keeping occupancy observations as separate evidence.
What should I record after installing freshwater fish habitat?
Record the placement ID, habitat type, actual coordinates, date, measured depth, water-level reference, and deployment changes. Save photographs and follow-up observations with the same placement ID so the site remains traceable.
One last thing
A sampling station is a place where fish were collected, not an installation instruction. That distinction prevents a report from becoming a map full of structures placed for the wrong reason.
Write the intended function beside every proposed location before approving the deployment. If the entry says only “more fish,” replace it with an observable objective and a method for checking it.