

Drone Mapping Fish Habitat Placement: Workflow 2026
1st Oct 2026
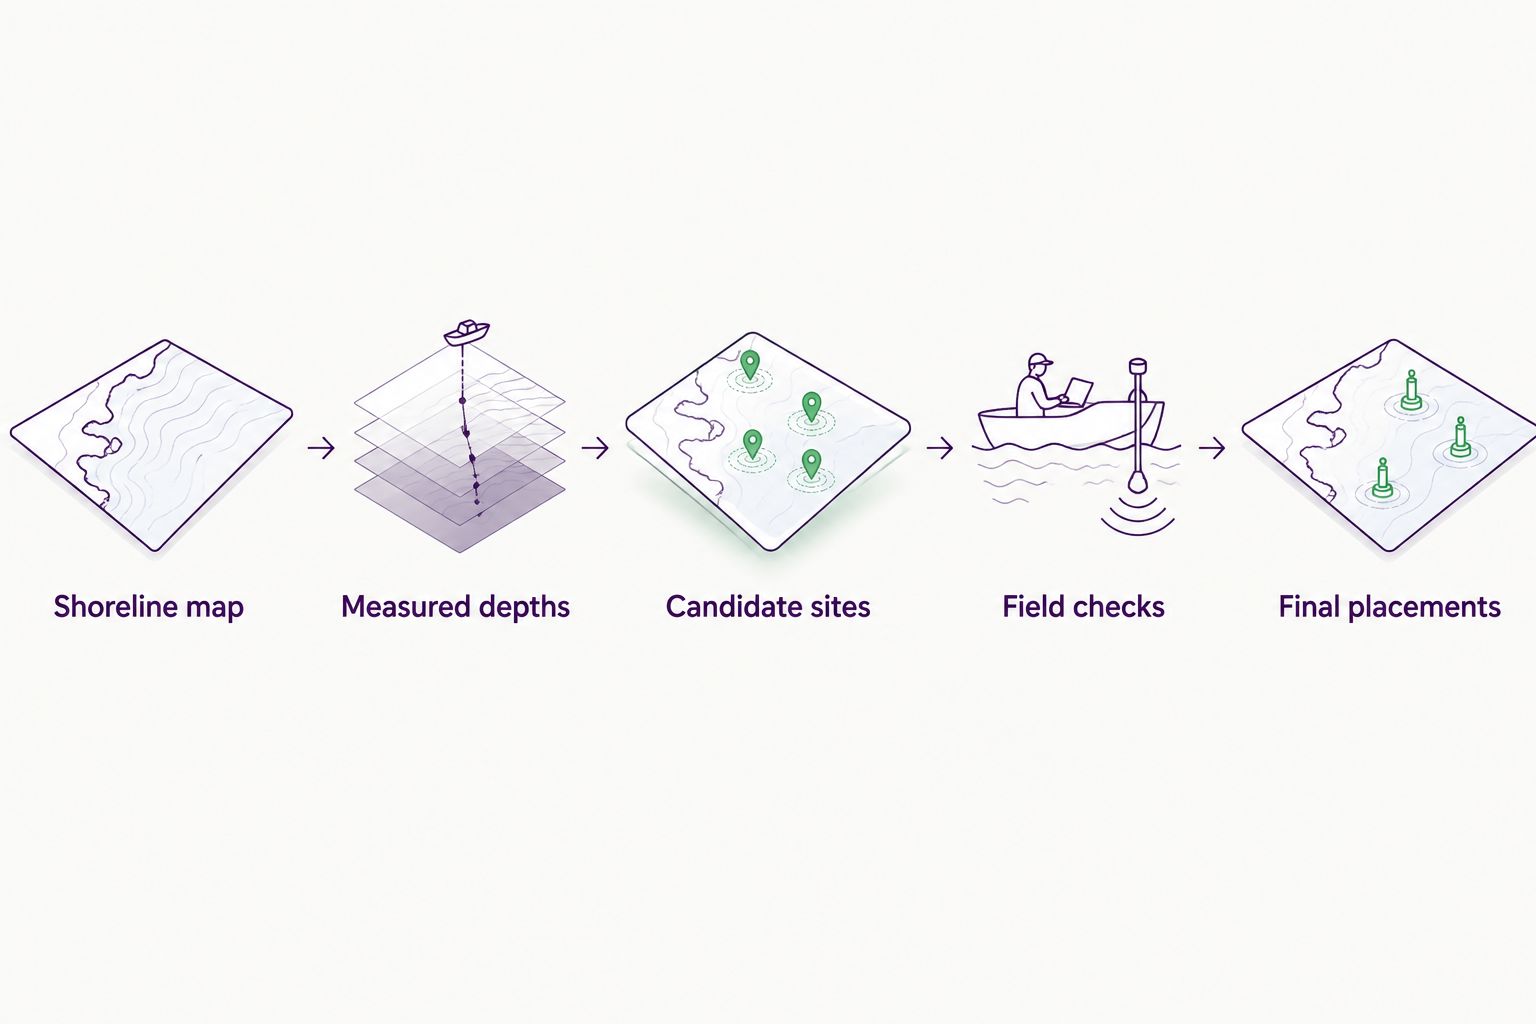
If you are placing fish cover from a drone photo alone, you are guessing at the depth beneath it. For drone mapping fish habitat placement in 2026, map the shoreline from the air, add measured water depths, mark candidate sites, and confirm each site on the water before installing habitat.
- For drone mapping fish habitat placement, pair aerial imagery with measured depths; a drone photo does not show reliable bottom depth.
- Fishiding is best for freshwater owners and managers who want self-weighted, dense habitat after placement sites are verified.
- Mark candidate sites on the map, then check depth, access, and existing cover at each location before installation.
- Keep the map and depth records so you can revisit placements and compare later observations.
Why this matters
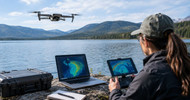
Aerial imagery helps you find shore access, points, coves, and visible changes along the bank. It cannot tell you the depth of opaque water or prove that a spot needs more cover. For a bass placement decision, use measured depth alongside the considerations in this fish attractor depth guide.
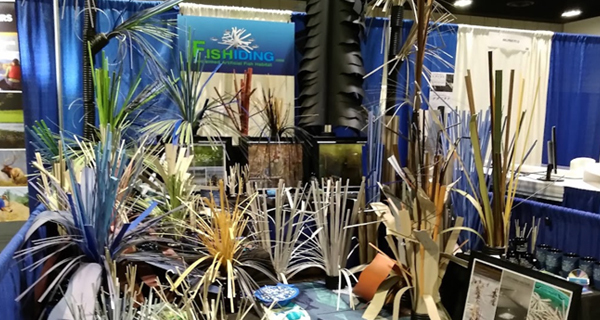
Fishiding is best for pond and lake owners who want dense, self-weighted freshwater fish habitat at sites confirmed by on-water measurements. Its reclaimed PVC preassembled habitat does not require added ballast, but choosing a unit does not replace checking the site. Fishiding’s more than 15 years and thousands of hours of underwater filming document fish use of its habitat; those observations are not a depth survey of your pond.
The useful 2026 workflow separates three kinds of evidence: what the drone shows, what your depth readings show, and what you verify from a boat or the bank. Keeping those layers separate prevents a crisp-looking map from giving an unsupported answer.
Before you start
- Get access and permission. Confirm that you can fly at the site, use the launch area, and enter the water or shoreline to check placements. Follow the flight rules and any local installation requirements that apply to your water body.
- Gather the records. You need a drone image that can be exported as a georeferenced mosaic, a way to record GPS positions and water depths, and notes on existing brush piles, fish cribs, vegetation, and access. A depth finder and a position-recording device can supply the on-water observations.
- Pre-empt the mapping mistake. A drone photograph is not a bathymetric map. If you do not have measured depths, label your sites as candidates rather than assigning them to shallow, mid-depth, or deep-water habitat.
You can work in QGIS or another mapping program that accepts georeferenced imagery and point data. The QGIS labels below identify a concrete desktop workflow. Drone flight and image-processing controls depend on your equipment, so use your equipment’s instructions rather than treating these labels as drone controls.
Capture and prepare the shoreline map
The aerial layer is your placement backdrop. Its job is to show features you can recognize again from shore or on the water, not to reveal an unseen bottom.
- Plan the flight around the shoreline and access points. Include the banks, launch area, visible existing structure, and the water where you expect to evaluate sites. Avoid a map that covers only open water; recognizable shoreline features make field checks easier.
- Capture overlapping images under usable light and wind conditions. Check the images before leaving. Glare, shadows, surface chop, and blurred frames can hide the features you meant to map. Follow the flight and image-processing instructions for your equipment.
- Process the images into a georeferenced mosaic. Export the finished map as a GeoTIFF. Keep the original images so you can revisit a feature that looks unclear in the mosaic.
- Open the mosaic in QGIS. Choose Layer > Add Layer > Add Raster Layer, select the GeoTIFF, and inspect whether recognizable bank features appear where you expect them. Check the project’s CRS in Project > Properties before bringing in position records; mismatched coordinate reference systems can put otherwise valid points in the wrong place.
Expected result: you have an aerial map with recognizable shoreline landmarks. You have not assigned habitat depth or declared a visible patch suitable for installation.
Add measured depths and candidate sites
A position and its depth belong in the same record. If they are separated, the map cannot reliably tell you which depth belongs to which proposed habitat site.
- Record on-water observations. Save a position and a depth in feet at each place you measure. Note the water level or date of the survey, because a later change in water level changes the depth above a fixed structure. Record visible cover and practical access in a separate note for each site.
- Organize the records in a table. Use clear columns such as
site_id,longitude,latitude,depth_ft,survey_date, andnotes. Keep the coordinate format consistent; latitude and longitude in decimal degrees are straightforward to import when you set the matching coordinate system. - Import the table. In QGIS, use Layer > Add Layer > Add Delimited Text Layer. Select the table, assign X field to longitude and Y field to latitude, and set the geometry’s CRS to the one used by those coordinates. Check several imported points against landmarks or recorded positions before trusting the full layer.
- Mark candidates, not commitments. Create a point or polygon layer for proposed habitat sites. For each, note the measured depth, intended cover type, existing nearby cover, access route, and what still needs checking. Keep an uncertain site visibly marked as uncertain rather than filling in a guessed depth.
Expected result: each proposed site has a map position, a traceable depth observation, and a list of unresolved field checks. Aerial imagery and measured depth are now separate, inspectable layers.
A 2026 map does not become more accurate because its contour lines look smooth. If you choose a 1-foot contour interval, first check that your sounding coverage and depth measurements support that level of detail. Otherwise, display the measured points without contours. The interval is a display choice, not a claim that your survey resolves every 1-foot change across the pond.
Confirm placement and install the habitat
The map narrows your search. The field visit determines whether a candidate works for the habitat you intend to place.
- Visit each candidate position. Recheck depth and compare it with the recorded reading. Look for existing cover, vegetation, bottom obstructions, and a clear installation route. Correct the map when the field observation disagrees with the aerial image.
- Match structure to the job. For small fish shelter, assess whether the site provides access to dense, intricate cover. For larger fish, consider how the chosen structure relates to nearby forage cover and usable water depth. Fish use varies by species, life stage, season, and water body; do not treat one depth as right for every placement.
- Choose a cover type with its tradeoff in view. Record whether the site calls for an existing brush pile to remain, a DIY build, a habitat mat, or a preassembled unit. Confirm openings and placement for the fish and maintenance access you need.
- Install and record the final position. Follow the instructions for the selected habitat and the rules for your water body. Update the map with the actual position and installation date instead of leaving the candidate marker in place as if it were the finished site.
Expected result: your 2026 map distinguishes surveyed locations, rejected candidates, and installed habitat. Anyone returning to the site can tell which decisions came from measurements and which came from a field check.
Compare the cover options before you place one
A drone map helps with location; it does not make every habitat type interchangeable. Select the option that fits the site you verified.
| Cover option | Best for | Advantage | Limitation to plan around |
|---|---|---|---|
| Existing natural cover or brush piles | Sites where useful cover is already present | You can map and retain cover rather than adding a structure automatically | Its position and condition still need checking; an aerial image alone does not establish what is below the surface |
| DIY fish habitat | Owners who need to adapt a build to a checked location | You control the layout and can work from recorded site constraints | You must plan assembly, stability, openings, and installation for that build |
| Fishiding habitat mats | Freshwater sites where a mat format fits the placement plan | Fishiding mats are self-weighted; its reclaimed PVC provides intricate habitat | A mat cannot correct a poorly chosen depth or an obstructed site |
| Fishiding preassembled attractors and cribs | Owners and managers who want a ready-built structure at a verified site | The preassembled units are self-weighted and need no added ballast | You still need to check access, depth, and fit before placement |
Choose the site first, then the structure. A measured, accessible location with a clear habitat purpose is more useful than a precise map marker placed in unsuitable water.
Place habitat when an existing map is already available
You do not need a new drone flight every time you revise a habitat plan. If you already have a usable georeferenced aerial image, start with that layer and spend the field visit collecting the information it cannot show.
- Open the existing map and check its fit. Compare shoreline landmarks with current conditions. Mark any changed bank, access point, or visible cover rather than assuming the image still reflects the site.
- Add new depth and cover observations. Import your current position records using Layer > Add Layer > Add Delimited Text Layer. Keep the survey date with the readings so you do not mix measurements taken at different water levels without noticing.
- Revisit candidate sites. Move, reject, or retain each marker after an on-water check. Record the reason. A change in access or an existing brush pile can change the plan even if the mapped depth stays the same.
Expected result: the map becomes a current placement record without treating an older image as a current depth survey. In 2026, that is often the better workflow when shoreline imagery is already adequate and measured depths are the missing piece.
Troubleshooting the map-to-placement workflow
- Depth points appear far from the pond. Check whether X field contains longitude and Y field contains latitude. Then check the point layer’s CRS against the coordinate format in your source table. Do not drag the points into place by eye.
- The mosaic looks clear, but you cannot see the bottom. Keep depth as unknown until you measure it. Clear shoreline imagery does not turn opaque or reflective water into a reliable bottom survey.
- A proposed site conflicts with existing cover. Check it on the water and update the candidate layer. Map the existing brush pile or vegetation before deciding whether another structure belongs there.
- The sounding map produces implausibly tidy contours. Display the original depth points and inspect their spacing. Remove contours that imply detail between measurements you did not take; collect more soundings where the placement decision depends on that detail.
- The installed structure is not at the planned marker. Record its actual position. Keep the original candidate as a planning record or remove it from the final-placement layer so a later visit does not confuse the two.
Customize your workflow
For a small pond, a map of checked sites and individual depth readings can be enough to make a placement decision. For a larger lake or reservoir, organize candidates by shoreline reach or depth zone so a field crew can check them in a repeatable order. Neither approach requires pretending that an aerial image supplies underwater measurements.
Add a simple status field to your candidate layer: proposed, checked, rejected, or installed. Add a reason whenever you reject or move a site. Those notes matter when you return after a water-level change or review fish use later in 2026.
If you monitor placements, record observations by location and date. Fishiding’s underwater filming spans more than 15 years and thousands of hours and documents use of its dense freshwater habitat. Your own repeat observations can show which installed sites fish use in your water body; do not turn a sighting at one structure into a population-wide result.
For a pond where habitat count is the next decision, map candidate locations before estimating coverage. One 1-acre pond can contain different depths, access constraints, and existing cover; area alone does not identify suitable placement points.
FAQ
Can a drone map show the right depth for fish habitat?
No. Use drone imagery to map visible shoreline features, then measure water depth at candidate placement sites. An aerial photograph is not a substitute for depth readings.
What is the first step in drone mapping fish habitat placement?
Start by mapping recognizable shoreline and access features. Then add measured depths before labeling any location suitable for shallow, mid-depth, or deep-water habitat.
Do I need bathymetric contours to place fish attractors?
No. Mapped depth readings at checked candidate sites can support a placement plan. Add contours only when your measurements support the detail those lines suggest.
Is a brush pile or a preassembled fish crib better?
Choose based on the verified site and the cover already there. An existing brush pile can remain useful cover, while a Fishiding preassembled crib provides self-weighted, dense freshwater habitat without added ballast; either choice still needs a placement check.
Can I reuse an older drone image for a new habitat plan?
Yes, if its shoreline landmarks still match the site closely enough for planning. Add current depth and field observations, and mark changed access or cover before placing habitat.
How do I record a fish structure after installation?
Save its actual position, installation date, and the depth observed at placement. Keep final installations separate from candidate markers so the map remains useful on a return visit.
Does seeing fish at a structure prove the pond has more fish?
No. An observation documents use at that place and time, not a population change across the pond. Fishiding’s long-term underwater footage documents freshwater fish using its habitat; evaluate population-level outcomes separately.
One last thing
Map rejected sites as carefully as installed ones. A rejected marker with a depth reading and a reason prevents the same unsuitable spot from being proposed again. Your next move is to select a depth zone, check the candidate sites on the water, and record the placements you actually make.