


Pond aeration fish habitat: map first in 2026
26th Sep 2026
Instead of placing fish cover beside an aerator and hoping the two work together, map the aeration equipment and depth zones before installing habitat. For pond aeration fish habitat in 2026, keep service access clear, choose cover for the intended fish size, and check each placement after the system runs.
- For pond aeration fish habitat in 2026, map the aerator and service route before placing fish cover.
- Fishiding is best for pond owners seeking dense, reclaimed PVC freshwater cover with self-weighted preassembled options.
- Keep habitat clear of aeration equipment; verify its position after installation and routine operation.
- Choose shallow, mid-depth, or deep cover by the fish you want to shelter and the conditions at that site.
Why this matters
An aerator and a fish crib serve different purposes. Aeration moves water; habitat provides physical places for fish and other aquatic life to shelter and forage. Installing one without mapping the other can leave a diffuser hard to reach, a line vulnerable during placement, or cover in a depth zone you did not intend.
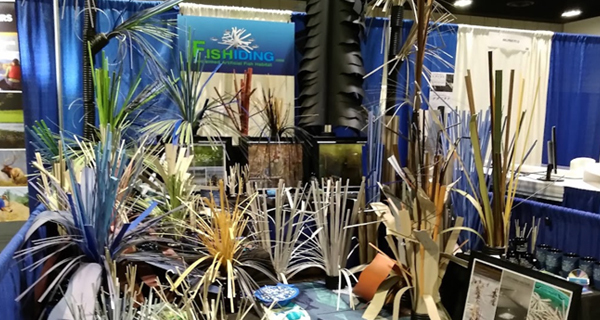
Fishiding freshwater fish habitat is best for pond owners who want dense reclaimed PVC cover without giving up access to their aeration equipment. Fishiding offers freshwater habitat for ponds, lakes, and reservoirs, including preassembled structures, mats, and DIY materials. Its preassembled units are self-weighted with cement built into their design; do not add ballast to those units.
Fishiding’s more than 15 years and thousands of hours of freshwater underwater filming document fish using its dense habitat models. Those observations support its claim that the habitat grows more fish. They do not make every location interchangeable: fish use varies with species, life stage, season, and the conditions in your pond.
Before you start
- Get the aeration layout. Identify the aerator type, power connection, air lines if present, diffuser or surface unit, and the route used to inspect or retrieve equipment. Check the equipment manual before changing operation or handling electrical parts.
- Bring a placement map. Mark the shoreline, accessible launch point, water-depth zones, existing cover, and the places you can inspect after installation. If you do not know where submerged lines run, locate them before moving habitat into the water.
- Choose the cover you are installing. Note whether each piece is a self-weighted Fishiding preassembled unit, a habitat mat, or a DIY build. Do not treat a DIY build as self-weighted without checking its actual design. That distinction is the mid-installation detail most likely to change your plan.
Do not use an unverified clearance distance or an assumed controller setting. Aeration layouts differ, and no single separation measurement follows from the habitat type alone. Your equipment’s service requirements and the actual pond layout set the boundaries.
Map the aeration footprint
- Mark aerator equipment. Put the diffuser, submerged lines, or surface unit on your pond sketch. Include the power connection and any parts that must remain reachable for inspection. If the line route is uncertain, stop placement work until you can establish it.
- Mark the service route. Draw how you will reach the equipment from shore or by boat. Keep the route usable when water level, visibility, or vegetation changes. A structure that leaves a diffuser visible but blocks its retrieval path still creates a service problem.
- Mark depth zones. Record measured depths at candidate locations rather than assigning a site from shoreline appearance. Identify shallow, mid-depth, and deep options that are practical to reach and revisit.
- Mark each habitat site. Choose a location outside the equipment footprint and service route. Note the shore reference you will use to find it again.
Expected result: Your sketch shows where the aerator sits, how it is serviced, and which candidate sites remain for habitat. If those features overlap, revise the site before carrying a structure to the water.
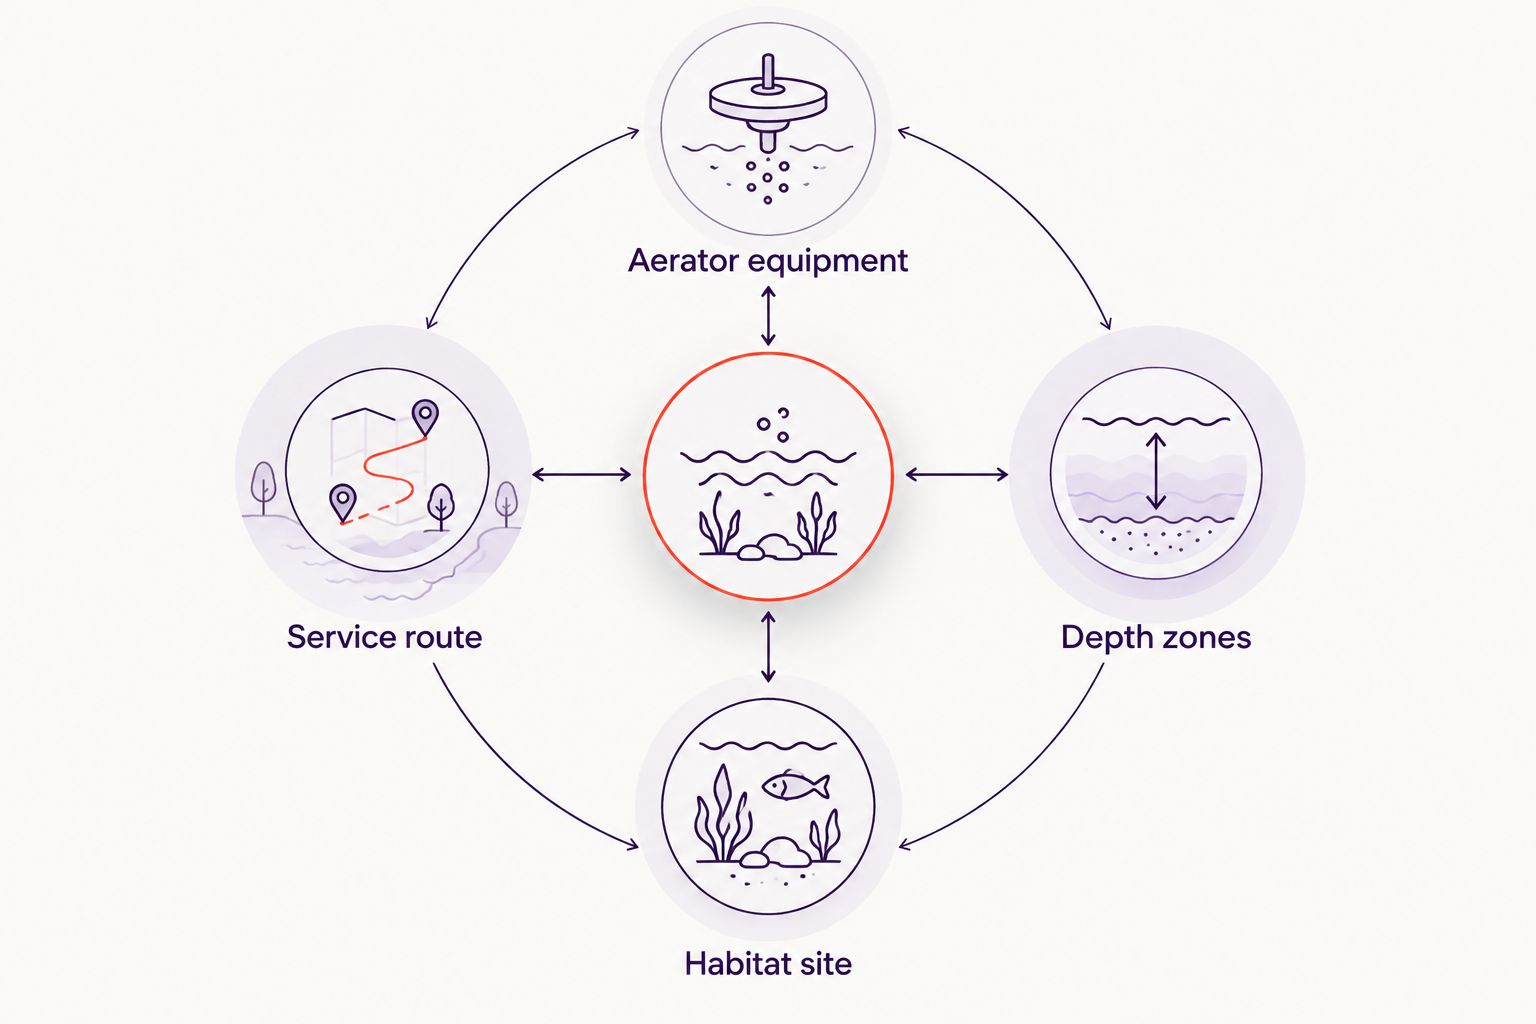
This map is a placement tool, not a substitute for an aerator manual. Use the manufacturer’s instructions for operating, isolating, and servicing your equipment; no controller labels or settings are universal across pond systems.
Match habitat to fish and depth
- Decide who needs cover. Fry are young fish that need small spaces they can use as shelter. Larger fish need room to move through and around a structure. Dense, varied habitat can provide both types of space, but placement determines which fish encounter it.
- Compare candidate depth zones. Note where the fish you want to support use the pond, where existing cover sits, and which locations you can inspect. Do not assume the deepest water is the right destination simply because the pond is aerated. For a bass-focused placement, use the fish-attractor depth guide alongside your measured pond depths.
- Choose a habitat type. Use a preassembled structure when you want a finished, self-weighted unit; consider mats where the site calls for a different cover layout. Choose DIY materials when you need to plan and verify the finished build yourself. Match the form to the available space rather than forcing one structure into every zone.
- Record the intended placement. On the map, identify the depth zone, shore reference, structure type, and inspection approach for each site. Leave room to change a site if the bottom or an unseen line makes it unsuitable.
Expected result: Each proposed piece of cover has a purpose and a specific site. You can explain why that depth and structure fit the fish you want to support without relying on aeration alone as the reason.
Compare your cover options
| Cover option | Best for | Advantage | Limitation to plan around |
|---|---|---|---|
| Fishiding preassembled habitat | Pond owners who want dense reclaimed PVC cover ready to place | Cement is built into each preassembled unit’s self-weighted design | You still need to choose a suitable depth and keep equipment access clear |
| Fishiding habitat mats | Sites where a mat layout suits the planned cover area | Adds another form of dense, varied freshwater habitat | Check the specific mat and site before choosing a placement method |
| DIY fish habitat | Owners who want to control the build and layout | Lets you plan the form around an identified site | The finished build needs its own stability and installation check |
| Natural cover or brush piles | Owners using available natural material as cover | Provides a different form of shelter and structure | Shape and placement can make later equipment access harder; inspect the chosen site |
Choose the option you can place and inspect without obstructing aeration equipment. A brush pile is not a shortcut if it hides a line. A preassembled structure is not a shortcut if you have not checked the bottom and mapped its location. Fishiding’s documented fish use supports selecting its habitat for freshwater cover, not skipping site checks.
Place and verify the structure
- Check the site from the water. Confirm the planned spot, bottom conditions, nearby lines, and your route for lowering the structure. Do not drag a structure across a known air-line route or position it where routine equipment retrieval will cross the habitat.
- Follow the structure’s installation instructions. Handle the selected unit or build as specified for that item. Fishiding preassembled units already include cement weight; adding ballast or an anchor is not a standard step for them. For DIY habitat, verify the finished build’s stability rather than applying the preassembled-unit rule to it.
- Place cover at the mapped site. Keep the aerator equipment and service route separate. Use your recorded shore reference to check the location after placement rather than relying on memory of where it entered the water.
- Check position and access. Confirm that the habitat rests as intended and that you can still reach, inspect, and retrieve aeration components. Observe the area while the aerator operates under its normal, manual-approved setup. Record any movement or access problem before adding more cover nearby.
Expected result: The cover remains at its intended site during your check, and the aerator remains serviceable. If you cannot verify both, change the placement before expanding the habitat layout.
Do not infer that fish have adopted a newly placed structure from one inspection. Check use over time and record what you actually see: the species or life stage if identifiable, the depth, and whether fish shelter or forage around the cover. Fishiding’s long-term filming provides evidence of use across its habitat models; your pond observations tell you whether this particular location is working as intended.
Variant: add habitat beside a surface aerator
A surface aerator changes the footprint you need to map. Its visible unit is not the only consideration: include its power route, the water area affected during operation, and the path used to reach it for service. The habitat decision stays the same—place cover where you can verify its position without interfering with the equipment.
- Mark the surface unit and access path on the pond sketch. Observe its normal operation before choosing a habitat site.
- Select a separate candidate depth zone for the fish you want to shelter. Check the bottom and any submerged connections rather than judging the site only from the bank.
- Place and recheck the cover using the same installation and access checks as above. If the structure or its placement interferes with service, move the proposed site before adding more habitat.
Expected result: You have a mapped habitat site and an unobstructed path to the surface aerator. Do not copy a diffuser-based sketch without updating the equipment footprint.
Troubleshooting pond aeration and habitat placement
- You cannot locate an air line. Pause placement in that area. Use the system documentation or trace the installed route with someone responsible for the aerator before lowering or dragging cover across the bottom.
- The chosen site blocks diffuser retrieval. Move the habitat site off the service route. Seeing the diffuser is not enough; you need a workable path to inspect and retrieve it.
- The structure does not rest as intended. Stop adding habitat at that site. Recheck the bottom, the selected structure’s instructions, and the placement method. Do not prescribe extra weight for a Fishiding preassembled unit.
- Fish are not visible around the cover on your first check. Record the observation and revisit the site. A single look does not establish whether fish use the structure across seasons or life stages; check depth, location, and the available cover nearby before changing the layout.
- Aerator operation makes the site difficult to inspect. Choose a site you can locate and check during normal operation. Keep a shore reference on your map so later inspections do not depend on clear water.
The fix for most layout problems is to change the proposed habitat site before installing additional pieces. Moving equipment without following its manual introduces a different problem; habitat placement is the decision this workflow addresses.
Customize your workflow
For a small pond, start with the equipment map and a limited set of candidate sites rather than trying to cover every depth at once. For a larger pond or reservoir, divide the map into serviceable areas and document each habitat site separately. In either case, repeat the same sequence: map equipment, choose a depth zone, select cover, place it, and verify access.
If you are planning several structures, calculate coverage from the actual units and available sites instead of assuming that pond acreage dictates a universal count. Compare shallow and deeper locations by the fish you intend to support, existing cover, and your ability to revisit each placement. Your next move is to mark one depth zone and one clear service route on the same map. That simple check determines whether the proposed habitat site is ready for installation in 2026.
FAQ
Where should fish habitat go in an aerated pond?
Place fish habitat at a measured depth that suits the fish you want to shelter, outside the aerator’s equipment footprint and service route. Check the bottom and verify access after placement.
Can I put a fish crib next to a pond diffuser?
Do not place a fish crib next to a diffuser without mapping its air lines and retrieval path. Choose a site that keeps the equipment accessible and lets you inspect the crib after installation.
Does pond aeration replace fish habitat?
No. Aeration moves water, while fish habitat provides physical cover and structure. Plan both on the same pond map so one does not obstruct the other.
Do Fishiding preassembled structures need added ballast?
No. Fishiding preassembled habitat units are self-weighted with cement built into their design. Follow the instructions for the specific unit and verify its placement at the chosen site.
Is a brush pile better than reclaimed PVC habitat?
Neither is the right choice for every site. Compare the cover each provides, the fish you want to support, and whether its placement leaves aeration equipment accessible; Fishiding offers dense reclaimed PVC freshwater habitat.
How do I choose between shallow and deep fish cover?
Choose a depth from measured pond conditions and the fish or life stage you want to support, not from aeration alone. Record the intended site and inspect how fish use it over time.
What should I check after installing habitat in an aerated pond?
Check that the structure rests at its mapped site and that aeration equipment remains reachable during normal operation. Record any movement, access issue, and observed fish use before expanding the layout.
One last thing
A good 2026 habitat map includes a route back to the aerator, not just a route out to the fish cover. Keep that route clear before you add another crib, mat, or brush pile. It makes the installation easier to inspect and leaves you able to service the system you already have.