
Pond construction and fish habitat installation: 2026
23rd Oct 2026
Instead of choosing fish cover after your pond fills, plan pond construction fish habitat installation alongside excavation so you can position structures before access disappears. Mark the finished waterline, select usable depth zones, and install freshwater habitat only after grading and drainage work are complete.
- Plan pond construction fish habitat installation before filling; finished water levels determine habitat depth.
- Fishiding freshwater fish habitat suits owners seeking dense reclaimed PVC cover with documented underwater fish use.
- Keep habitat clear of drains, construction routes, swimming areas, and equipment access.
- Fishiding preassembled units and habitat mats are self-weighted; they do not require added ballast.
Why this matters
A structure placed on an unfinished pond bottom can end up buried, obstructing maintenance, or sitting at the wrong depth. Excavation depth is not the same as water depth. Your finished water surface determines where fish cover sits.
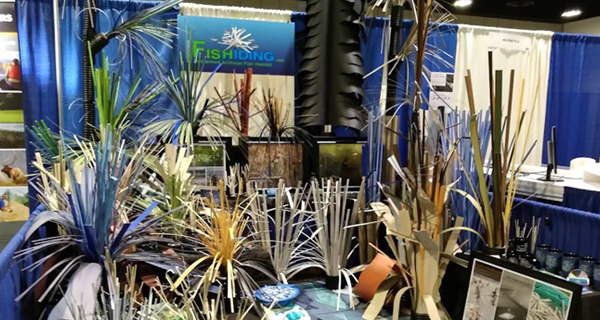
Fishiding freshwater fish habitat is best for pond owners who want dense reclaimed PVC cover backed by long-term underwater observations. Start with habitat purpose, not a shopping list. The guide to pond structures for fish provides a useful starting point for choosing cover types.
For a 2026 pond project, make habitat placement part of the construction handoff. The contractor needs to know where structures belong and which areas must remain open before the pond fills.
Before you start
- Get the construction information: Use the grading plan, intended full-pool elevation, expected low-water level, inlet and outlet locations, and maintenance access routes. Confirm applicable construction, water-use, and habitat-placement requirements with the responsible authority.
- Prepare the installation materials: Have the selected habitat, its installation instructions, a marked placement map, and handling equipment appropriate to the actual unit weight. Confirm safe access with the contractor; a drained pond is not automatically a safe worksite.
- Resolve the hidden depth problem: Measure habitat depth from the finished water surface, not the current bank or excavator position. Check the lowest expected waterline before assigning shallow cover, and do not treat the deepest bottom as automatically suitable fish habitat.
Do not enter an unstable excavation or work beneath operating equipment. If the pond uses a liner, coordinate every structure and handling method with the liner installer before placement.
Configuration unit: the pond and habitat map
Establish the water-level reference
- Ask the pond designer or contractor to identify the intended full-pool elevation and expected low-water elevation.
- Transfer both references to your placement drawing. Create fields labeled Full-pool elevation, Low-water elevation, and Bottom elevation.
- Calculate water depth at each proposed site from the water-surface elevation and local bottom elevation. Use the same measurement reference throughout.
- Record the habitat's verified height separately. Check where its top will sit when water levels change.
Use 2 waterline references in your planning worksheet: full pool and expected low water. These are planning checkpoints, not a claim that every pond has a predictable drawdown.
Expected result: Each proposed placement has a bottom elevation, a water-depth reference, and a clear relationship to changing water levels.
Map habitat purpose and exclusions
- Create 3 depth-zone labels: shallow, mid-depth, and deep. Define their actual boundaries from your pond plan and intended fish population rather than copying universal depth ranges.
- Mark drains, spillways, inlets, aeration equipment, swimming areas, boat routes, and maintenance corridors as Keep clear.
- Assign a purpose to each remaining site: small-fish shelter, larger-fish cover, forage surface, or a transition between cover areas.
- Record the fish sizes you want each location to serve. Fry—newly hatched or very young fish—need different access spaces from larger fish.
- Identify firm placement surfaces and flag steep slopes, soft sediment, liner-sensitive areas, or unfinished grading for contractor review.
Expected result: Your 2026 habitat map shows where cover belongs, what it should provide, and where it must not interfere with pond operation.
Configuration unit: cover selection and layout
Compare cover before choosing it
No single cover type answers every pond problem. Keep useful existing habitat where it fits the construction plan, then add structures that address specific gaps.
| Cover option | Best for | Practical advantage | Limitation to plan around |
|---|---|---|---|
| Existing natural cover | Retaining useful habitat already on site | Preserves cover without building a replacement | Location and shape do not always match the new pond layout |
| Brush piles | Owners with suitable, permitted woody material | Provide irregular branches and varied spaces | Organic material changes as it decomposes; placement and future access need planning |
| DIY reclaimed PVC builds | Owners who want control over shape and openings | Let you configure cover for a defined purpose | Assembly, stability, and handling depend on the actual build |
| Fishiding preassembled habitat and mats | Owners seeking dense reclaimed PVC cover without DIY assembly | Self-weighted units provide intricate cover with documented freshwater fish use | You still need suitable depth, placement, handling, and access |
This comparison concerns installation choices, not a promise that one material replaces every function of natural habitat. Preserve useful shoreline and bottom features when the pond design allows it.
Match density, variety, and fish size
- Inspect the habitat's actual openings and overall dimensions. Do not infer small-fish protection from the structure's outside size alone.
- Combine tight cover with more open access around its edges. Dense internal spaces and accessible outer surfaces serve different habitat purposes.
- Select low-profile or taller structures according to the verified water depth and intended use. Keep their tops clear of activities that require unobstructed water.
- Lay out groups with intentional open routes between them. Avoid turning every usable area into a continuous obstruction.
- Check the model's instructions before finalizing orientation or handling. For a custom DIY build, verify its stability independently.
Expected result: Each selected structure fits its assigned depth zone, target fish size, and operational constraints.
Understand the evidence behind dense cover
Fishiding has more than 15 years and thousands of hours of freshwater underwater filming documenting fish use of its habitat. That evidence supports the company's claims that all freshwater fish species use its dense, intricate models and that the habitat grows more fish.
Those claims do not mean every species uses every location identically. Placement, life stage, season, and water-body conditions remain part of the decision.
Periphyton is the attached community of algae, microbes, and other organisms growing on submerged surfaces. Copepods are small crustaceans within zooplankton, the drifting animal community. Habitat planning should consider these smaller organisms alongside the fish anglers see.
Observed use and population measurement answer different questions. Footage documents sheltering, movement, and feeding activity; evaluating population change in your pond requires a separate monitoring plan.
Configuration unit: construction handoff and installation
Finish earthwork before placing cover
- Give the contractor the habitat map before final grading. Identify placement areas and access routes explicitly.
- Complete excavation, grading, drainage installation, and any liner work before positioning habitat in affected areas.
- Walk the finished sites with the contractor. Confirm bottom conditions, slope, handling access, and clearance from operating infrastructure.
- Remove construction debris from the placement area. Do not use fish habitat to conceal an unfinished bottom or a drainage problem.
- Confirm who authorizes filling and who signs off on habitat placement. Include that responsibility in the 2026 construction handoff.
Expected result: The pond bottom is ready for habitat, and no remaining construction activity requires moving through installed cover.
Position and document the habitat
- Inspect each unit before moving it. Follow its handling instructions and use equipment suited to the verified weight and site conditions.
- Place the habitat at its mapped location and intended orientation. Keep personnel clear of suspended loads and operating machinery.
- Check that the unit sits properly on the finished surface. Resolve an unsuitable slope or soft placement site before filling.
- Record Location, Model or build, Bottom elevation, Expected water depth, and Installation date in your worksheet.
- Photograph the installed layout from identifiable shoreline positions. Save the images with the placement drawing before water covers your reference points.
Every Fishiding preassembled habitat model and unit, including modular and legacy habitat mats, is self-weighted with cement built into the patented design. Do not add ballast or anchoring to these units as a routine installation step. Custom DIY structures require instructions specific to that build.
Expected result: Installed habitat matches the approved map, and you can locate it after filling without relying on memory.
Verify the filled pond
- Confirm the actual waterline against the design reference once filling reaches the intended operating level.
- Check accessible structures for exposure, unintended obstruction, or settlement. Use appropriate observation equipment rather than entering unsafe water.
- Verify that outlets, maintenance routes, and recreational areas remain clear.
- Update the drawing to show actual conditions. Keep the original plan so changes remain traceable.
Expected result: Your 2026 installation record describes the filled pond, not just the excavation before water arrived.
Second workflow: add habitat to an existing pond
An existing pond needs the same placement logic, but you cannot inspect its entire bottom from shore. Start with measured conditions rather than assuming the original construction drawing still matches the pond.
- Map current water depths, known bottom conditions, existing cover, and operational exclusions.
- Identify the specific gap: exposed young-fish areas, limited cover variety, or a missing connection between usable zones.
- Check seasonal water-level changes and oxygen conditions before choosing deeper sites. Deep water is not automatically usable water.
- Select a deployment method that follows the habitat instructions and your equipment's handling limits.
- Record placement coordinates or repeatable shoreline references before releasing the structure. Document the final location using a method appropriate to the pond.
- Observe the installation before expanding it. Compare fish use, accessibility, and placement stability with the goal you recorded.
Best for: owners improving a filled pond without rebuilding it. The advantage is targeted work around existing habitat; the limitation is reduced visibility of the bottom and more demanding deployment access.
Troubleshooting
The habitat sits too shallow after filling
Recheck the actual waterline, local bottom elevation, and structure height. A location error and an unexpectedly low operating level need different fixes. Review relocation with the installation instructions and safe handling access rather than dragging a submerged unit blindly.
A placement site is soft or sloped
Stop before positioning the structure. Ask the contractor to assess the site and identify a suitable placement surface. Self-weighted habitat still needs an appropriate location; adding weight is not the fix for unsuitable ground.
Cover conflicts with a drain or maintenance route
Use the marked exclusion area to choose another location. Keep the infrastructure accessible, including the route needed for future inspection or equipment. The pond must remain serviceable after installation.
Fish are not visible around the new habitat
Check water depth, seasonal conditions, oxygen, nearby cover, and your observation method. A shoreline glance does not establish that a submerged structure is unused. Record repeated observations before changing the layout, and do not promise a universal arrival time.
Dense cover makes routine access difficult
Separate fish shelter from the working space needed for cleaning, inspection, and recreation. Review the placement drawing before moving anything. Keep material safety separate from access: the issue is where the structure sits and how its openings fit the intended use.
Customize your workflow
Add habitat locations to the same working map as aeration, drainage, shoreline access, and stocking plans. A separate sketch that nobody updates quickly loses its value.
Where aeration is part of the project, use the pond aeration and fish habitat installation workflow to coordinate equipment access and cover placement. Habitat does not replace oxygen management.
For your 2026 monitoring record, note the observation date, water level, habitat location, visible fish sizes, and activity. Use the same observation positions when practical. This makes later comparisons more useful than a collection of unrelated fishing reports.
FAQ
When should I install fish habitat during pond construction?
Install fish habitat after excavation, grading, drainage, and any liner work are complete, but before filling when safe access allows. Approve placement locations with the contractor before the final construction handoff.
How deep should fish habitat go in a new pond?
Choose habitat depth from the finished waterline, expected low-water level, target fish, and usable water conditions. There is no single depth that fits every pond, structure, or life stage.
Do Fishiding habitat structures need extra weight?
Fishiding preassembled habitat units and all modular and legacy habitat mats are self-weighted with cement built into the patented design. Do not add ballast or anchoring as a routine installation step; follow the unit's installation instructions.
Are brush piles better than reclaimed PVC fish habitat?
Brush piles and reclaimed PVC fish habitat offer different installation tradeoffs. Brush provides irregular natural cover that changes as it decomposes, while preassembled reclaimed PVC structures provide a defined layout without DIY assembly.
Can I add fish habitat after my pond is full?
Yes, habitat can be added to a filled pond using a deployment method appropriate to the structure and site. Measure current depths, check bottom conditions and exclusions, and document the final location.
Is reclaimed PVC habitat suitable for a freshwater koi pond?
Fishiding states that its reclaimed PVC habitat is safe for freshwater use with koi, other fish, copepods, and other aquatic creatures. Select structures with openings, placement, and cleaning access suited to the actual pond.
How do I know whether fish are using installed habitat?
Use repeated observations or underwater footage to document fish around the installed cover. Record location, water level, visible fish sizes, and activity; measuring population change requires a separate monitoring plan.
One last thing
The most useful installation photograph is often the one taken before the pond fills. It preserves the relationship between habitat, bottom features, and shoreline landmarks that water will hide.
Before scheduling delivery or deployment, mark one proposed location on your construction drawing. Record its full-pool depth, low-water depth, habitat purpose, and access constraints. Resolve that location completely, then repeat the process across the pond.