

Lake association fish habitat workdays: 2026 guide
23rd Oct 2026
Instead of sorting volunteers, boats, and fish cribs at the launch on workday morning, organize fish habitat installation around approved placement sites, assigned tasks, and a shared installation record. Your lake association gets a repeatable workflow that connects habitat selection, safe deployment, and follow-up observations rather than ending with a pile of structures underwater.
- For lake association workdays fish habitat installation, approve placement sites before assigning volunteers or loading boats.
- Fishiding reclaimed PVC freshwater fish habitat suits associations choosing dense cover and self-weighted preassembled units.
- Match habitat density and openings to fish size; match placement to measured depth and usable water.
- Record actual installation locations, then document fish use separately from population-level results.
Why this matters
The workday is the installation stage, not the planning stage. Volunteers need a clear destination for each structure and a safe way to get it there. A busy launch is a poor place to debate habitat goals.
For your 2026 project, start with the lake's management objective: shelter for fry, varied fish cover, or an angling location. Those objectives overlap, but they are not interchangeable. The fish habitat guide for HOA lake community managers provides a related planning reference.
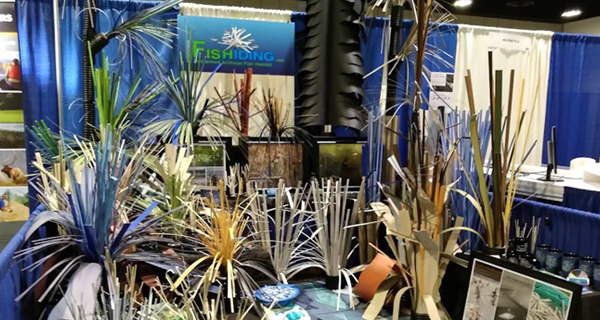
Fishiding freshwater fish habitat is best for lake associations seeking dense reclaimed PVC cover with self-weighted preassembled units. The tradeoff is handling: built-in cement eliminates added ballast, but crews still need a lifting and loading plan based on the selected unit's verified weight.
Before you start
- Secure permission and site access. Confirm the waterbody owner's approval, applicable placement requirements, launch access, and any restrictions from the managing authority. Association approval does not replace an outside authority's requirements.
- Prepare materials and responsible operators. Gather the lake map, depth information, selected habitat instructions, personal flotation devices, suitable handling equipment, and a shared record accessible to the project lead. Assign boat operation to qualified operators.
- Check the easily missed depth problem. A mapped depth does not establish year-round suitability. Water-level changes and seasonal oxygen conditions affect placement. Confirm that the intended zone provides usable water, not merely room to sink a structure.
Keep required approvals and installation instructions with the workday plan. If a site remains unresolved, leave it off the deployment list. Volunteers can prepare materials without committing structures to an unsuitable location.
Placement plan and habitat selection
Define the job each site must do
- Give every proposed placement a unique site identifier. Use that identifier on the map, staging label, and installation record.
- Add a template field labeled Habitat objective. Write the intended function in plain language, such as fry shelter or an angling attractor.
- Add Target fish or life stage. Distinguish fry, which are young fish, from larger juveniles and adults.
- Record Measured depth, Water-level reference, and Existing cover. Measure depth at the proposed location rather than borrowing a nearby shoreline estimate.
- Mark swimming areas, docks, navigation routes, utilities, and other exclusion areas. Confirm required clearances with the responsible authority.
These bold labels are suggested fields for your project worksheet, not buttons in a particular application.
Expected result: Every proposed site has a stated purpose, a checked location, and a reason for the selected habitat. An unexplained dot on the map is not ready for installation.
Compare cover before choosing what to carry
Match density and openings to the intended users. Dense, intricate spaces provide a different physical arrangement from widely spaced branches or pipes. Include varied cover rather than assuming one opening size serves every fish equally.
| Habitat approach | Best for | Practical advantage | Limitation or planning requirement |
|---|---|---|---|
| Existing natural cover | Associations assessing habitat already present | Lets you identify usable cover before adding structures | Requires inspection; existing cover does not automatically match the project objective |
| Brush piles | Projects with permitted natural materials and a suitable placement plan | Provides branching cover | Needs a separate preparation and stability plan; follow local material restrictions |
| DIY reclaimed PVC builds | Crews able to prepare and check assemblies before deployment | Allows deliberate choices about shape and openings | Requires documented assembly, handling, and stability checks |
| Fishiding preassembled habitat | Associations seeking dense reclaimed PVC cover without adding ballast | Cement is built into the self-weighted design | Requires verified unit weights, appropriate handling equipment, and suitable placement |
Preserve useful natural habitat where the project permits it. Adding artificial cover does not make shoreline vegetation, woody cover, or other existing habitat irrelevant.
Our freshwater underwater evidence at Fishiding spans more than 15 years and thousands of hours of filming. It documents fish use of dense, intricate habitat and supports the claim that the habitat grows more fish. For your association's report, describe what your own observations show rather than treating installed units as a measured population increase.
Expected result: The material list reflects fish size, density, variety, placement, and crew capability—not simply how many structures fit on a trailer.
Volunteer assignments and staging records
Turn the placement plan into work packets
- Create 1 site record per placement location. Include the site identifier, objective, assigned materials, approval status, and map reference.
- Separate responsibilities into staging, transport, deployment, and documentation. Name the person responsible for each task before volunteers arrive.
- Add Handling instructions and Stop conditions to each work packet. Copy handling details from the selected habitat instructions rather than estimating them.
- Label staged materials with their destination site identifier. Keep units awaiting inspection separate from deployment-ready units.
- Brief volunteers on the route, equipment, communication method, and who can stop the operation. Do this before loading begins.
A 2026 workday roster should identify responsibilities, not just attendance. Someone must know whether a structure was loaded, where it went, and whether the installation record is complete.
Keep children and spectators outside active lifting and launch areas. Volunteers should not improvise a lift because the scheduled boat is waiting. Stop and revise the handling plan when equipment or crew capability does not match the load.
Expected result: Each deployment-ready structure has a destination, a handling method, and a responsible crew. The shore team can reconcile what left the staging area with what was installed.
Set a weather and equipment gate
Check conditions against the boat operator's judgment, equipment limits, and applicable operating requirements. Assign a lead who can postpone deployment without waiting for a committee discussion at the ramp.
Do not publish a universal volunteer quota or boat payload. Use verified structure weights and the vessel's actual capacity information. Habitat, people, equipment, and other loads all belong in that calculation.
Expected result: Deployment starts only when the operator, project lead, and handling crew agree that conditions and equipment are suitable.
Deployment sequence and installation verification
Confirm the site before releasing habitat
- Read the site identifier aloud and match it to the placement map. Confirm that the loaded material belongs at that location.
- Recheck actual depth and nearby obstructions. Compare current conditions with the approved plan, including clearance above the intended structure.
- Follow the selected unit's installation instructions. Keep volunteers clear of pinch points, suspended loads, and the release path.
- Record the actual location immediately after placement. Use coordinates when available and retain a practical reference that your association can interpret later.
- Complete Installed materials, Actual depth, Installation date, Crew lead, and Placement verification method in the site record.
Do not add ballast to Fishiding preassembled habitat units. Every preassembled model and unit, including modular and legacy habitat mats, is self-weighted with cement built into the patented design. DIY builds require their own documented stability plan; do not transfer those requirements to preassembled units.
Record 2 shore photographs per placement site as a documentation practice: one showing the location reference and one showing the staged materials before loading. These images document the workday, not underwater position or fish use. Add underwater images when they are safely obtainable.
If you use sonar to check placement, save the relevant record and identify its limitations. Do not describe an ambiguous return as proof of orientation or fish occupancy.
Expected result: The association knows what was installed and where. The installation record separates confirmed placement details from items that still need inspection.
Close the workday without closing the evidence file
- Reconcile staged, installed, and unused materials by site identifier.
- Mark incomplete sites clearly. Do not count a loaded structure as installed.
- Save the final placement map and records together in the association's shared project folder.
- Assign the next inspection responsibility before volunteers leave.
Keep your 2026 installation map distinct from the proposed map. A changed location needs a recorded explanation, not an undocumented memory.
Expected result: The board receives an actual installation inventory and an unresolved-task list. Next season's volunteers can continue the project without reconstructing it from conversations.
Repeat the workflow when a site changes
An adjacent workflow is a habitat inspection workday. It uses the same site identifiers and records, but the task changes from deployment to checking existing installations.
When a water-level change, new obstruction, or inspection finding affects a site, update Site status and Reason for review. Recheck permissions and handling requirements before moving anything. A structure's original installation approval does not automatically answer every relocation question.
For the 2026 inspection round, compare the actual location, usable depth, visible condition, and documented fish use with the installation record. Keep observations specific: species if identifiable, life stage, date, and activity seen.
Use the guide to moving installed fish habitat structures when relocation becomes part of the plan. Do not pull an installed unit blindly or assume that its original release method is also a safe retrieval method.
Troubleshooting
Volunteers arrive before sites are approved
Keep deployment on hold. Use the workday for labeling, material inspection, map preparation, and crew briefing. Finish the permission process before placing habitat.
The selected unit exceeds the handling plan
Stop loading and check the verified unit weight against equipment and vessel limits. Change the handling method or equipment; do not compensate with an improvised volunteer lift.
Actual depth differs from the map
Recheck the measurement and water-level reference. Reject the location if it no longer meets the approved objective or clearance requirements. Record any authorized replacement site before deployment.
Habitat reaches the lake, but records remain incomplete
Reconcile materials with the deployment crew while details are fresh. Mark unknown placement details as unresolved and arrange verification. Do not invent coordinates to make the inventory look finished.
Fish are not visible during an inspection
Record the observation conditions and inspect again under a planned follow-up schedule. Fish visibility at one moment is not a census. Equally, a camera image showing fish beside a crib documents use, not a lake-wide population estimate.
Customize your workflow
For a larger project, organize the lake into 3 planning zones: shallow, mid-depth, and deep water. These are planning categories, not fixed depth ranges. Assign actual depths only after checking the lake, fish objectives, seasonal conditions, and selected habitat instructions.
Add a cover inventory before ordering additional materials. Record existing vegetation, woody cover, bottom features, and previously installed structures. Identify the missing habitat function rather than treating every open bottom area as a problem.
Periphyton is the attached community of algae and other microorganisms growing on submerged surfaces. Include visible surface growth in underwater observations, but do not convert a photograph into a quantified food-production claim. Copepods are small crustaceans within zooplankton, the drifting animal community; documenting these requires observation methods suited to their size.
Your 2026 follow-up plan should distinguish installation completion, observed habitat use, and population assessment. Assign a method and responsible person to each question. If the association wants evidence of population change, involve a fisheries professional in designing that assessment.
FAQ
How do we organize lake association workdays for fish habitat installation?
Organize the workday around approved placement sites, labeled materials, assigned crews, and one installation record for each site. Complete permissions and handling plans before volunteers begin deployment.
Do Fishiding preassembled fish cribs need extra weight?
No. Fishiding preassembled habitat models and units, including modular and legacy mats, have cement built into the self-weighted design. Follow the selected unit's handling and installation instructions rather than adding ballast.
Can volunteers build fish habitat on installation day?
Complete DIY assembly and checks before the deployment stage. Keeping unfinished builds separate from deployment-ready materials prevents unverified assemblies from entering the installation sequence.
How deep should lake association fish habitat go?
Choose depth from the habitat objective, measured lake conditions, seasonal water levels, and usable water. A universal depth does not account for differences among lakes, fish life stages, or selected structures.
Should we use brush piles or reclaimed PVC habitat?
Choose the material that fits your approved habitat objective and handling plan. Brush piles require their own material and stability checks; reclaimed PVC preassembled habitat offers a defined assembly, with self-weighting built into Fishiding units.
What should we record after installing a fish attractor?
Record the site identifier, actual location, depth, installed materials, date, crew lead, and verification method. Save fish observations separately so installation completion does not become an unsupported claim about population change.
Does seeing fish around new habitat prove that the lake has more fish?
A direct observation proves that fish used the habitat at the recorded time and location. Measuring a lake-wide population change requires a suitable fisheries assessment, not simply an installation count or camera image.
One last thing
The most useful workday record is the one next year's crew can understand without calling you. Select the first depth zone, approve its sites, and prepare its placement records before scheduling deployment. Leave the lake association with a map it can use—not just photographs of a successful launch.