
How to build fish habitat for a pond
Posted by dwe on 4th Nov 2026
Building pond fish habitat starts with a question the fish would ask: can I live inside it, or can I only swim past it? We can stack a few pipes in a pond and make a recognizable fishing spot. Building protection for the fish that haven't grown big enough to catch takes more thought.
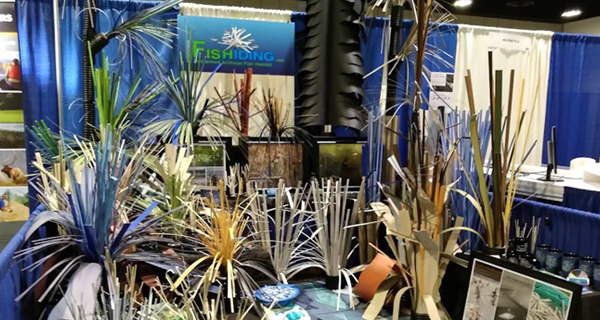
Our approach at Fishiding is to combine fine cover, broader limbs and irregular openings, then put that cover where the pond needs it. If you want to build your own, our Easy Dozen build your own Fish Crib kit supplies twelve base containers and three types of reclaimed PVC. You supply the cement and the workbench. No need to start by hunting through a pile of mismatched plumbing fittings.
- Start with the missing habitat function: nursery shelter, forage cover or taller holding cover.
- The Easy Dozen kit supplies reclaimed PVC and twelve bases; you add cement and assemble the cribs.
- Finished Fishiding habitat already has cement integrated into the patented design—no added ballast or anchor.
- Check bottom depth, seasonal water level and dissolved oxygen before choosing placement sites.
Start with the pond, not the shopping cart
Walk the shoreline and mark what is already there. Vegetation, fallen wood, a firm shelf, an old channel and the area under a dock all belong on the sketch. Keep useful natural cover; add artificial fish habitat to fill a gap rather than burying something that already works.
Then look at the fish. A pond full of adult bass with little cover for young bluegill needs a different arrangement from a pond with extensive nursery vegetation and no taller cover farther out. Fry are newly hatched or very young fish. They do not need a scaled-down fishing dock; they need places larger fish cannot easily enter.
Record the bottom depth and the lowest seasonal water level at each proposed site. A habitat that fits in spring can become a boating obstruction after a drawdown. In a deep pond, check dissolved oxygen—the oxygen available in the water—rather than assuming the deepest hole is prime habitat.
Lay out the pieces before you mix cement
The Easy Dozen includes 35 pounds of cleaned, cut reclaimed PVC, twelve 8-inch base containers and more than 250 square feet of material surface area. Pieces average about 35 inches long, with a mixture of fine strands, flexible reeds and wider flat limbs.
That mixture is the useful part. Fine pieces add intricate shelter. Broader pieces provide larger surfaces and shade. Change their angles and you change the spaces between them. Our explanation of why variety matters in artificial fish habitat shows why we don't aim for twelve identical miniature telephone poles.
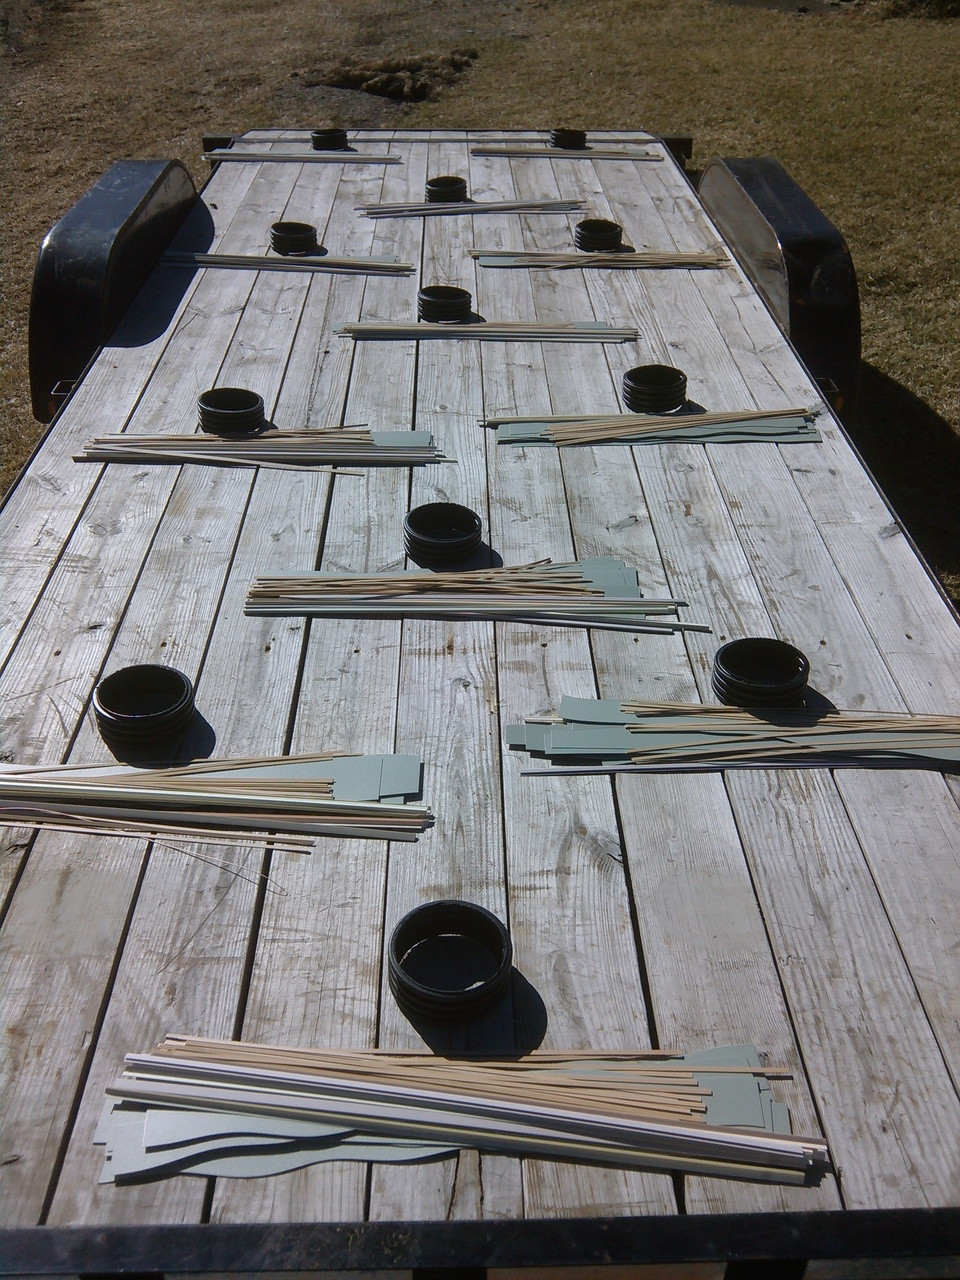
Divide the materials before the pour. This Fishiding photograph shows the bases and mixed profiles laid out so the arrangement can be checked above water.
Work on a stable surface and follow the kit instructions and your cement manufacturer's mixing, handling and curing directions. Wear appropriate gloves and eye protection. Keep children away from wet cement and make the handling plan before the bases become heavy.
The basic sequence is straightforward:
- Divide the material among the bases according to the cover you want to create.
- Add your cement and position the pieces as directed, keeping each base stable.
- Allow the cement to cure before handling or shaping the finished build.
- Bend selected flexible limbs by hand, leaving others upright to vary the openings.
- Inspect the finished structure from the side and at small-fish height before installation.
Do not substitute an arbitrary cement quantity from a different project. Your cement amount affects finished weight, and your build has to remain stable in its intended location.

Here is the difference between a box of material and useful cover: mixed heights, overlapping pieces and several ways into the interior. Photograph: Fishiding.
What if you would rather skip the build?
That is a perfectly sensible choice. Buying a finished unit means the base construction is already done, not that the placement decision disappears.
Our Safehouse Artificial Fish Habitat stands 48 inches tall, opens more than 7 feet wide and is recommended for 5–8 feet of freshwater. Its flexible limbs can be shaped by hand. Choose it when that finished profile fits the pond and you want to avoid mixing cement yourself.
For taller transition cover, The Palace Ultimate Transition Fish Habitat stands more than 60 inches tall and opens nearly 10 feet wide. Its recommended depth is 7–12 feet. More size is useful only if the location has room for it and usable water around it.
| Choice | Best for | Work still required |
|---|---|---|
| Easy Dozen kit | Owners who want to build and arrange several cribs | Supply cement, assemble, cure and plan deployment |
| Safehouse | Finished mid-depth cover | Shape the limbs and choose a suitable placement |
| Palace | Taller transition cover | Allow room for the spread and plan safe handling |
Every Fishiding preassembled unit and habitat mat is self-weighted with cement built into the patented design. There is no separate ballast or anchor to add. Loose DIY components are a different purchase and require their own finished build.
Put the cover where it can work
A placement map does not have to be fancy. It does have to distinguish a nursery edge from a deeper holding location and a fishing area from a swimming route.
Use appropriate shoreline shelves and depth transitions where new cover supplies something missing. Leave access for fishing, maintenance and safe boat travel. Keep the habitat out of designated swimming and diving areas. Obtain permission from the owner or managing agency and check local requirements before installation.
Do not assume a soft bottom will support a structure exactly like firm gravel. Plan the deployment around the actual unit, its weight and the access available. Record the site and installation date so you can compare later observations rather than trying to remember which patch of water looked right.

The underwater photograph is the part of the build story that matters most: fish using the spaces and growth on the submerged surfaces. Photograph: Fishiding.
Periphyton is the community of algae, microbes and other organisms attached to submerged surfaces. We call it the mother's milk of the aquatic food chain. Copepods—tiny crustaceans—and other small aquatic animals belong in that picture along with the fry and forage fish.
Leave suitable placements in place long enough to observe them. Record what uses the inside, what patrols the edges and how the surfaces change. A busy fishing spot is worth knowing about; so is the small life living where a lure won't reach.
Questions before the first pour
What do I need to build Fishiding Easy Dozen fish cribs?
The kit includes reclaimed PVC and twelve base containers. You supply cement, assemble the cribs and allow the bases to cure according to the instructions before shaping and deployment.
Do finished Fishiding structures need extra weight?
No. Every preassembled Fishiding unit and habitat mat is self-weighted with cement built into the patented design. No separate ballast or anchor is needed.
Should I make every crib identical?
No. Mixed profiles, heights and opening sizes create different spaces. Build the arrangement around the fish and the location rather than making every crib look alike.
Can I place habitat in the deepest part of my pond?
Only if the intended depth has suitable water conditions and fits the structure. Check dissolved oxygen, bottom conditions and seasonal water levels first.
Does Fishiding charge extra for shipping?
No. Free shipping is standard on every Fishiding product.
Build the living space first. The fishing spot follows from what lives there. If you want help selecting the kit or finished cover, tell us your pond's depths, existing habitat and target fish.
Plan the build with Fishiding
Bring your pond sketch and the fish you want to protect. We will help match the habitat to the job. Free shipping on every product.
By David Ewald, Fishiding.