
Videos & Installation Instructions
Practical setup for freshwater habitat
How to Install Fishiding Artificial Fish Habitat
All finished Fishiding models are self-weighted: cement is already poured into each unit. No separate weight, ballast or anchor is needed. Choose a spot deep enough to keep the top of the habitat underwater at the lowest expected water level.
1. Open and shape the habitat
Set the unit on a tailgate or small outdoor table so you can work at waist height. Remove the shipping tie, let the limbs relax, then bend them in different directions. Fold some over one another and pinch each crease with your fingers to help set its shape. Most units take less than five minutes to open and shape.
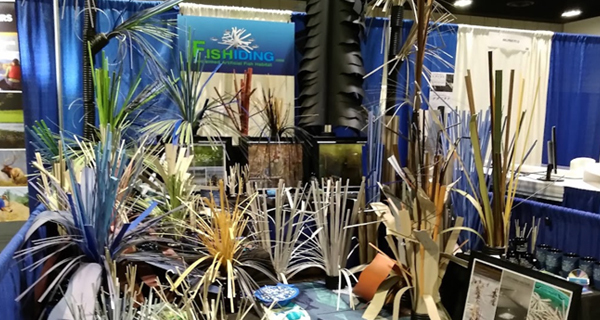
There is no wrong way to bend a unit—just open it up. Spreading the limbs provides surfaces for periphyton to grow and small spaces for aquatic insects and copepods. Leave a few limbs upright for height, or bend them lower to fit your water depth. Pieces that hang downward on land can rise into position underwater.
For ideas, watch the installation video and look at your model’s product pictures showing it shaped and installed. These are examples, not a required final shape.

2. Check the details for your model
- Cradle, Briar and HighRise pucks or tops: Remove the tie and work around the base, bending limbs in varied directions. Add a second bend where you want more detail.
- Bunker: Slide off the twist tie, let the fine strands hang, and bend the two tips of each U-shaped limb in different directions. It needs little shaping.
- Smallstake and HighRise tops: Leave a few center limbs upright and bend the others once or twice. Shape a HighRise top before fastening it to its base by hand with the included fittings. Place Smallstakes in groups in shallow water.
- Safehouse and Palace: Pull some limbs sideways through the unit, fold them over one another, and pinch the bends. Leave a few center limbs upright if you want maximum height.
- Keeper and HighRise bases: Keep the center trunk supports in place while shaping the limbs around them. On a HighRise base, remove the small scrap piece of 3-inch tile used for shipping protection before fitting the top.
- Self-opening 54-inch Stakeout, Fishadow, Ultra Fine Cradle and Fortress: These can be placed directly from the box. If desired, spread or bend the fine center strands on the Ultra Fine Cradle and Fortress for added detail.
- DIY Shleafs: If they flatten in the box, fold each piece along its existing 90-degree crease by hand to help it stand upright again. DIY Shleafs are set into customer-supplied cement bases; unlike finished models, their cement is not already poured.
3. Place the habitat
Choose a firm, reasonably level bottom so the base can settle without sinking into deep muck. Keep the top below the lowest expected water level and the placement clear of swimming and boating routes. Set units near one another when you want a larger area of connected cover. In deeper water, consider whether fish will have enough oxygen at that depth during the season you want them to use it. Check local rules before placing habitat in public water.